Showing posts with label Country Village QAL. Show all posts

Monday, May 11, 2015

Are You My Giveaway Winner???

Hi peeps! 


So, did you(if you are a mom) have a good Mother's Day? I sure did! The Hubs gave me a G/C for a pedicure at the local spa(easy to get to) and then surprised me and splurged on Chinese take-out!!! Woo-Hoo!!! I can't remember the last time we had restaurant food! What a sweet guy… The Kid brought home a dessert from work and I am saving it for tonight after supper as I had too many treats(the Chinese food) last night.

Now for the winner of my bountiful giveaway! 

I had 402 comments(a record for me!) and asked The Hubs choose a number between 1 and 402. He chose #356…and the winner is: Frederique from France(holey postage, Batman!!!)!!! I have emailed you and hope to hear back from you within 48 hours, or I will have to have The Hubs choose another number.


I just heard back from my lovely sponsor Connecting Threads. They are offering a prize(you'll have to tune in on May 17 to find out what!!!) to one lucky blog follower to celebrate the 1-year blogiversary of Quilt, sew Happy! Isn't that great? YAY!!!

Hop on over to Connecting Threads and show them some quilty love-they are having a sale on selected tools and books right now and have a new fabric collection too!


I will leave you with a nice little pile of fabric…I have to go finish up the photos for my Country Village Quilt-A-Long, Part 3-piecing the blocks! 


If you are a new follower and are just finding out about my quilt-a-long, you can find Part 1 here, and Part 2 here. Come join us!


Sharing is caring!!! 
Don't forget that I am happy to share with your friends…feel free to pin to Pinterest, post on Google+ and Facebook, and Tweet away! Just please play fair and make sure your posts link back to this blog. 
*If you mouse/hover over the top right corner of my photos, a red "Pin-it" button will show up and all you have to do is click it to be taken to Pinterest. There is also another red button right beside it for posting to Facebook and Twitter. Or, you could always use the little square grey buttons at the end of this post. 

Thanks for reading and have a great day! 

Quilty Huggs, 

Jacqueline 

PLEASE NOTE: This blog accepts forms of compensation such as, but not limited to; fabric/notions/patterns/books in exchange for a posted review and/or tutorial. All comments/critiques/opinions are completely my own and are not those of the provider. This blog may also contain affiliate links and I will receive a small commission if you make a purchase after clicking on one of my links. Thanks so much!

Sunday, May 10, 2015

Super Sunday: Happy Mail and Giveaway Reminder!!!

Hi peeps! 


We are having amazingly beautiful weather this weekend…but I can't go out and enjoy it as I have a migraine starting to build…groan…so today's post will be shorter than normal.

I received the above fat quarters in the Canada-only swap on Facebook I have mentioned before. April's theme was "April showers" and as you can see, there was a wide interpretation of the theme! 

I'm especially fond of the bright green fattie, as there are cute little umbrellas all over and words to a verse on spring rain.


I belong to another Facebook swap with a Canadian pen pal from Newfoundland, which is a province at the other side of the country(a large island off the eastern coast of Canada). 

In the past couple of months she sent me these three mottled fatties! They are really great blenders and I am so happy to have them! She also sent the cute fridge magnet. It is already on my fridge!


These items are also from the pal in Newfoundland-a crocheted hot pad/table protector, some embroidery floss(great for sewing buttons on quilts-though not for babies!). 
There is a big bag of assorted lime green buttons(cool!), and the cute pack of Canadian symbols buttons, bottom right. I will have to make up a Canada-themed wall-hanging so that I can use those buttons! There is a maple leaf, RCMP hat, snowflake and others inside.


I got these two charm packs from a Canadian seller's group on Facebook. I like buying 2 of the same charm packs as I rarely make really small quilts(except for baby quilts, table toppers and zippy pouches). I would need a larger amount of charms to make a lap or bigger sized quilt.

Giveaway is now closed and the prize has been awarded.

GIVEAWAY REMINDER!!!

These are the prizes I will be sending to one lucky individual!

There is still time to enter my Sew Mama Sew Giveaway(YAY!)! Giveaway closes today at midnight, pst. The Hubs will pick a lucky winning number tomorrow!


*Comments for the giveaway must be on the "Giveaway" post(link above) to be eligible to win.


In case you missed it, Part 2 of my Country Village Quilt-A-Long, featuring a block I designed(shown above) was published this past Wednesday. You can head over to that post using this link and it is also located in the Country Village QAL tab just below my blog header!

*Stay tuned for Part 3, this Wednesday, May 13th.


Last, but not least, I want to wish all of the moms out there a very Happy Mother's Day! I hope everyone has great weather and are able to spend time with their families.
The Kid had to start work at 11 am, so I won't be able to spend any time with him till after supper. He did give me a kiss on the cheek as he was leaving…a huge surprise! Believe me when I say that teenage boys DO NOT give kisses to their moms anymore…sniff..!
The Hubs gave me a much-needed gift certificate for a pedicure! Yay! 

Question of the Day:

Do you(if you are a mom) receive a Mother's Day gift from your child(ren)?…or does your Hubby give you one?


Sharing is caring!!! 
Don't forget that I am happy to share with your friends…feel free to pin to Pinterest, post on Google+ and Facebook, and Tweet away! Just please play fair and make sure your posts link back to this blog. 

*If you mouse/hover over the top right corner of my photos, a red "Pin-it" button will show up and all you have to do is click it to be taken to Pinterest. There is also another red button right beside it for posting to Facebook and Twitter. Or, you could always use the little square grey buttons at the end of this post.


Thanks for reading and have a great day! 

Quilty Huggs, 

Jacqueline 

PLEASE NOTE: This blog accepts forms of compensation such as, but not limited to; fabric/notions/patterns/books in exchange for a posted review and/or tutorial. All comments/critiques/opinions are completely my own and are not those of the provider. This blog may also contain affiliate links and I will receive a small commission if you make a purchase after clicking on one of my links. Thanks so much!

Wednesday, May 6, 2015

COUNTRY VILLAGE QUILT-A-LONG: PART 2-Cutting; Blocks, Cornerstones and Sashing Strips

Hi peeps! 


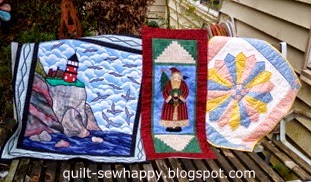
At long last, here is a pic of my Country Village block! Do you like it??? This block measures 15.5" x 15.5" now, and will be 15" square sewn in.

In case you missed it, here is the link to Part 1 of the Country Village QAL.


I know is seems silly to mention it, but do take the time to press your fabrics before cutting. It makes a world of difference for accurate rotary cutting. 

I also starched my fat quarters and the 3-15.5" strips x WOF(see below) with my spray starch recipe just for ease of use.


These are the rulers I used, along with my trusty ergo-handled rotary cutter. The large ruler is 8.5" x 24". I often need to cut strips that are wider than my regular 6" x 24" ruler, so this was a real find! The small square ruler measures 6" x 6" and you will use it a lot during cutting, and later for squaring up the 9 pieces of this block.
Be sure to put a new blade in your rotary cutter as there is a lot of cutting following!

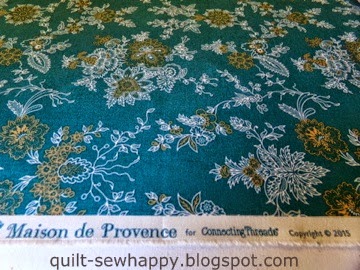
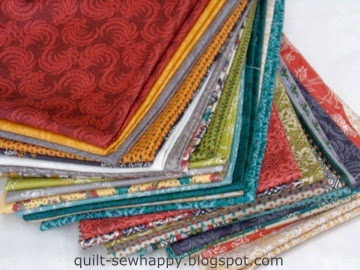
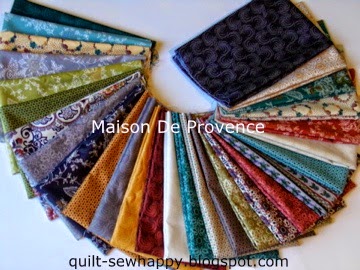
I just had to show you how cute the selvedges are on the Maison De Provence fabrics.

Your cutting requirements are as follows. I wanted to put them in list form so that you can easily copy and paste into a Word document and then take the cutting list to your work table.

WOF is the Width Of Fabric, which here is 42". If your fabric is narrower in width, you should buy at least a quarter yard more.

CUTTING LIST

-From each of your 25 fat quarters cut-
1-6.5" x 6.5" square
4-4.5" x 4.5" squares
4-3.5" x 3.5" squares
2-1.5" x 1.5" squares

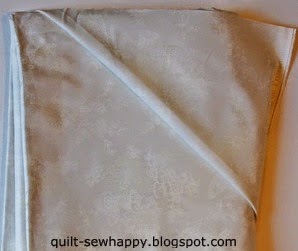
-From your 4.5 yards of "background" fabric(see my tone-on-tone print) cut-
3-15.5" x WOF strips, sub cut into 60-1.5" x 15.5" sashing strips*
2-2.5" x WOF strips, sub cut into 28-2.5" x 2.5" flippie squares*
11-5.75" x WOF strips, sub cut into 300-1.5" x 5.75" strips*
4-4.5" x WOF strips, sub cut into 100-1.5" x 4.5" strips*
7-3.5" x WOF strips, sub cut into 200-1.5" x 3.5" strips

*please follow the directions below, as there is very little waste here for this fabric and you need to use the remainders of some of these strips to cut other-sized pieces. 

-From your .75 yard of "center" fabric(see my pale orange print)
4-6.5" x WOF(save the off-cuts to piece 1 square)


I carefully stacked 4 of my starched fat quarters on my large cutting mat. 

Note: if you are a little unsure, or new to rotary cutting, I would suggest cutting just one fat quarter at a time.


Trim the selvedges off and also trim one of the long sides of your stack(the 21" side) so that you have a nice, even edge to start cutting from. 

Do this for all 25 fat quarters.


Cut your fat quarter stack(or single fq) into 1-6.5" x 21" strip, and 1-4.5" x 21" strip. 
The remaining strip(at top) is about 6.5" wide and you can put that away for another project(perhaps a matching pillow!).


Sub cut your 6.5" x 21" strip(at bottom) into 1-6.5" x 6.5" square and 4-3.5" x 3.5" squares. 
You can put the remaining 3" strip aside(top row). 

Sub cut your 4.5" x 21" strip(middle row) into 4-4.5" x 4.5" squares, and also 2-1.5" x 1.5" squares(these are cornerstones and you can put them in a little basket for when we start adding the sashings. 

The top of the photo shows what you will have left over; a 3" x 14"-ish strip, a 6.5"-ish strip and trimmings.


Here you can see 4 stacks of each fabric cut for 4 blocks.


So, from each fat quarter you have cut: 1-6.5" square, 2-1.5" squares, 4-4.5" squares and 4-3.5" squares. 
This is what is needed for each block.


Now we will look at the 15.5" x WOF strips. 
I prefer to fold my yardage in half so that you have your fabric fold on the right side and your selvedges together on the left side(in front of you on your cutting mat). 
This way I am cutting 2 of everything at once AND I omit using the center fold of the fabric which always seems to be a pain to get rid of, no matter how hard I try to press & steam it out!

Carefully fold your fabric in half, so that your selvedges are touching. 
Line it up on a line of your cutting mat, to keep your strip square. 
Cut the selvedges off and start cutting your 1.5" x 15.5" sashing strips.

*IMPORTANT- for the FIRST 2 strips cut 28 strips(or 14 cuts if you have folded your fabric in half)each, which will give you 56-1.5" x 15.5" strips. 
Cut only 4 strips(or 2 cuts if your fabric is folded) from the THIRD 15.5" x WOF strip(=total 60 strips) and put the remaining 15.5" x 30" partial strip aside for just a moment.
These are your sashing strips.


Take the 15.5" x 30" strip you just put aside and cut 12(6 cuts if fabric is folded) that are 2.5" x 15.5(you can see all that I had left over is the center fold , at the left of the photo). 
Sub cut each strip into 12(6 if fabric is folded) 2.5" x 2.5" squares, which will make 72 squares total with very little waste.


Take your 2-2.5" x WOF strips and fold carefully in half lengthwise so that the selvedges meet. 
Line up your strip on a line on your cutting mat, as you did last step. 
Trim the selvedges off and cut 16 squares(8 cuts if you fabric is folded) from each strip. 
You will have a few extra. 
If you want to be exact-cut 16 squares from your first strip and 12 from your second strip. 
You should now have a total of 104-2.5" squares, but you only need 100.
These are your flippie corners.


Here are your 11-5.75" x WOF strips.
Using all strips, fold in half so the the selvedges are meeting.
With each of the first 10 strips, carefully lay across a line on your cutting mat, trim your selvedges and cut 28 strips(14 cuts) that measure 1.5" x 5.75".
Now you have 280-1.5" x 5.75" strips.
Take your 11th strip, lay on a line on your cutting mat, trim off the selvedges and cut 20(10 cuts if your fabric is folded) 1.5" x 5.75" strips.
You will have 300-1.5" x 5.75" strips.
You should have a 6" x 5.75" strip left over.
*Keep this left over strip handy, you may or may not need it.


You will do a similar thing with the 4.5" x WOF strips.
You have four strips at this size.
Fold all strips in half, lengthwise, so that the selvedges meet.
For each of the first 3 strips-lay near a line across your cutting mat and trim off the selvedges.
Cut 28(14 cuts if you strips are folded in half) 1.5" x 4.5" strips.
You will have 84 of these 1.5" x 4.5" strips.
Take the 4th strip, lay across a line on your cutting mat and trim the selvedges.
Cut 16(8 cuts if your fabric is folded in half) 1.5" x 4.5" strips.
You will now have a total of 100 of these strips.
Save the 12" x 4.5" strip that is left over.


Here are your 7-3.5" x WOF strips. 
As before, fold each strip in half carefully, making sure the selvedges meet up.
With each of the first 6 strips, lay across a line on your cutting mat.
Trim the selvedges off. 
Cut 28(14 cuts if your fabric is folded) 1.5" x 3.5" strips from each 3.5" wide strip.
You will have 196 1.5" x 3.5" strips.
Take the 12" x 4.5" strip left over from the last step.
Trim so that it is now 3.5" wide.
Lay your little strip across a line on your cutting mat.
Cut 4(2 cuts if your fabric is folded) 1.5" x 3.5" strips.
You will now have 200 of these strips.


This is your centre fabric.
Take your 4-6.5" x WOF strips now.
Fold in half carefully so that the selvedges match.
Lay across your cutting mat, carefully matching up to an across line on your mat.
Trim off the selvedges.
Sub cut each strip into 6(3 cuts if your fabric is folded) 6.5" x 6.5" squares.
Reserve the end pieces of each strip where the fold is that you have just cut off.
You will have 24 6.5" x 6.5" squares…but you need 25.
The next step shows how to make your 25th square.


Here you see a 6.5" x 6.5" square and 2 of the end pieces your kept from the last step.
Sew these skinny 2 pieces together down the 6.5" side.


Press the seam open then trim the square so that it is 6.5" x 6.5".
When we get to the piecing stage that requires this square, you will see that your seam is barely noticeable. 
For real!
This square and another(one of the fat quarter 6.5" squares) will be part of an Hourglass square.
*I am pretty frugal, so I chose to do this particular square in this way.
If you don't want to piece one large square you could add 1/8th of a yard to your purchase of the center fabric(so you'd buy 7/8ths of a yard), then cut 5-6.5" x WOF strips and cut your one final square from the extra 6.5" strip.


So, finally, here are our requirements for each of the 25 blocks of this quilt:

4-4.5" x 4.5" squares, print fabric
4-2.5" x 2.5" squares, background/tone-on-tone fabric
4-3.5" x 3.5" squares, print fabric
1-6.5" x 6.5" square, center fabric
1-6.5" x 6.5" square, different print fabric
8-1.5" x 3.5" strips, background/t-o-t fabric
4-1.5" x 4.5" strips, background/t-o-t fabric
12-1.5" x 5.75" strips, background/t-o-t fabric

We will also need:

60-1.5" x 15.5" strips, background/t-o-t fabric
36-1.5" x 1.5" squares(cornerstones) print fabric*
*we actually only need 30 of these, but I cut more so that we have variety.


This is a step that needs to be done before we can start assembling our blocks, so I thought you could get a head-start on these.
Take your 25-6.5" x 6.5" squares of your center fabric and draw a diagonal line across the centre of the square, corner to corner. 
Then draw 2 other lines a scant quarter inch to the right and to the left of your center line. 
I use my Quick Quarter ruler for this and it goes by quite quickly!
These last 2 lines will be your sewing lines once we get to sewing up the blocks, next Wednesday.
Now take your 100-2.5" x 2.5" squares of background/t-o-t fabric.
Draw one diagonal line through the center of each, corner to corner.
This line must be straight as it will be your sewing line for your flippie corners.


Here ends our cutting session. YAY!!! 

Be sure to join me next Wednesday, May 13, 2015 for instructions on piecing the Country Village block.
;-)
************

Sharing is caring!!! 
Don't forget that I am happy to share with your friends…feel free to pin to Pinterest, post on Google+ and Facebook, and Tweet away! Just please play fair and make sure your posts link back to this blog. 
*If you mouse/hover over the top right corner of my photos, a red "Pin-it" button will show up and all you have to do is click it to be taken to Pinterest. There is also another red button right beside it for posting to Facebook and Twitter. Or, you could always use the little square grey buttons at the end of this post.

Thanks for reading and have a great day! 

Quilty Huggs, 

Jacqueline 

PLEASE NOTE: This blog accepts forms of compensation such as, but not limited to; fabric/notions/patterns/books in exchange for a posted review and/or tutorial. All comments/critiques/opinions are completely my own and are not those of the provider. This blog may also contain affiliate links and I will receive a small commission if you make a purchase after clicking on one of my links. Thanks so much!

SEW MAMA SEW GIVEAWAY IS HERE!!!**INTERNATIONAL** YAY!!!

Hi peeps! 


This is my giveaway package!
Welcome fellow travellers, to my stop on the Sew Mama Sew Giveaway train!!! Thanks for coming to my little blog, Quilt, sew Happy!  ;-)

For those of you who don't know, the Sew Mama Sew blog hosts a semi-annual(May and December) giveaway spree each year and that means there is lots of swag to be won!!! Woo-hoo!!! 


The Sew Mama Sew blog allows us blog writers to post a photo of what we are giving away as well as a link to our blog, on their website. This helps all sorts of new people to get to know different blogs and hopefully the participating blogs will gain new followers…so it's a win-win situation for everyone! 


We can choose to offer quilting/crafting supplies(like me) and/or a homemade item like a quilted pouch or mug rug. There is a USA-only mailing section, for those who prefer to mail the winnings to USA addresses only, and an International section…which is where I am, as I am a Canadian blogger! 

I have won a few prizes offered by several individuals over the last few years, and this is the first time I am offering a prize! I hope you'll agree, it's a goodie!


This is my one and only award-winning quilt, called "Kitty-Cat Chat"; I won a third prize ribbon at our local fair! I bought the cute cat print while on vacation visiting an Aunt and Uncle.

I thought you might like to get to know a little about me: 

I am a late-40's Christian wife and mother who loves to quilt, cook, and go thrifting/garage-saling for vintage finds. We live in a small town about an hour east of Vancouver, BC and have 2 sons, aged 24 and 16. The eldest is going to University in Eastern Canada and my youngest is enjoying having his first job!

I have been blogging for just under a year(my 1st blog-iversary is May 17th!); I've made more than a few beginner mistakes! Eek! Would you believe that I actually started this blog without owning a digital camera??? Ha ha ha!


Part of the over 4,000 x 1" hexies I made for a new quilt for my youngest son.

I am really enjoying getting to know the people that I come into e-contact with through this blog and have already held several giveaways(there might be another one coming on May 17!!…hint hint!)!

I guess you could say that my quilting style is Traditional-Modern. I love colour and have slowly begun to embrace solids, but my true love is scraps and scrappiness! I love all scraps equally; mine, from pen pals and scrap bags from thrift stores!

I like to make quick things, but am not deterred by a longer project. I have made so many quilts, including 6 full-sized ones for a women's shelter, but rarely photograph them(didn't have a camera). Everyone in my family and my in-laws have a bed-sized quilt that I made especially for them.


Wall-hanging I made with blocks from a block raffle at the Lions Gate Quilt Guild(I made the top right one). I got the little red sailboat buttons from a pen pal in France!

Come have a look around my blog! Under the various tabs you'll see I like vintage things, sharing recipes, thrifty tips and even have a few tutorials under my belt…yay! 


Last Wednesday, I started my very first quilt-a-long, with a block I designed, above. I'm so, so excited that one of my designs will actually be published, even though it is only being self-published!


Maison de Provence…the prints are so beautiful in person that it was hard to cut them up!

Here are part 1 and part 2 of my Country Village Quilt-A-Long, featuring the Maison de Provence fabric collection by Connecting Threads.  You can also find all the steps as they are posted under the QAL tab just below my blog name header.

So, without further ado, let's get to the giveaway!!!


GIVEAWAY HAS ENDED AND PRIZE HAS BEEN AWARDED


*Just to remind you!*


This is what one lucky individual will win from me:

-half-yard of the pink/black floral fabric with gold accents that is the background of the above photo,
-2 spools of Essentials-brand thread by Connecting Threads(black &white),
-Olfa-brand rotary cutter(45 mm blade),
-pack of Olfa-brand replacement blades,
-6-pack of handy Craft Clips(I use these to hang orphan blocks up in my sewing room),
-mini screwdriver with a big, chunky handle,
and,
-pair of metal thread snips.

…gee, I wouldn't mind winning a prize like that!!! Hee Hee Hee!

Here's the rules:

1. I am always very curious as to where my blog-readers are located(especially which country)…so, for your first entry, please tell me where you live, for ex: Vancouver, BC, Canada.

2. For a second entry, you can follow my blog via E-MAIL* or BLOGLOVIN' only and tell me how you do so. There is a follow-me window to enter your e-mail address and a follow by Bloglovin' button near the top right area of this blog, just below my profile blurb. 

-Those who follow my blog elsewhere(G+, Tw, FB etc.) must sign up to either above-mentioned method, to gain this second entry. 

*If you choose to follow me by e-mail, you will be sent a confirmation email from Feedburner(the e-mail sender). This is not spam. You must click on the link provided to activate you subscription to Quilt, sew Happy!, or you won't get my blog posts. I usually post only 2-3 times a week, so I won't be flooding your inbox!!!

(I know that most of you are here because of the SMS giveaway, but it would be great if you continue to be a follower of Quilt, sew Happy! even after the giveaway is over). ;-)

****2 entries ONLY per person, please****

This giveaway runs from Wednesday, May 6, 2015 to Sunday, May 10, 2015 at midnight, Pacific Time. My Hubs will choose a comment number as the winner on Monday, May 11, 2015. I will email you to let you know that you have won my prize and ask for your full name and snail-mail address.

***Please, please make sure I have a way to contact you, or you can't win. So many people are classified as a "no-reply blogger", which means there is no e-mail addy connected to their profile. If you are not sure, please include your email(I promise I will never use it, share it, sell it, whatever!!!). An easy way to type your email would be "your e-mail name (at) yahoo (dot) com", that way you shouldn't get anyone spamming your e-mail address.

Thanks for entering and good luck!

Sharing is caring!!!
Don't forget that I am happy to share with your friends…feel free to pin to Pinterest, post on Google+ and Facebook, and Tweet away! Just please play fair and make sure your posts link back to this blog. 

*If you mouse/hover over the top right corner of my photos, a red "Pin-it" button will show up and all you have to do is click it to be taken to Pinterest. There is also another red button right beside it for posting to Facebook and Twitter. Or, you could always use the little square grey buttons at the end of this post. 


Thanks for reading and have a great day! 

Quilty Huggs, 

Jacqueline 

PLEASE NOTE: This blog accepts forms of compensation such as, but not limited to; fabric/notions/patterns/books in exchange for a posted review and/or tutorial. All comments/critiques/opinions are completely my own and are not those of the provider. This blog may also contain affiliate links and I will receive a small commission if you make a purchase after clicking on one of my links. Thanks so much!

Friday, May 1, 2015

Happy May Day!!! Foodie Friday and Country Village QAL Reminder!

Hi peeps! 


I thought I would start some blog posts with photos of the quilts I have in my house. These three are "rescue" quilts. 

I found the lighthouse one at a community services garage sale. They only wanted $2 for it, so I happily opened my change purse and walked away with someone's artwork. It is dated 2000 and has the initials of the maker on it too. 

The Santa wall-hanging is a small panel, and the maker had added 2 log cabin blocks on the top and bottom as well as a border. It even has 2 plastic rings sewn onto the backing for hanging! 

The third quilt is a pretty Dresden Flower block in 1930's style reproduction prints. If you look closely at the centre, you can see she stitched a 9-patch block then trimmed it into a circle-very original! 

I found both the Santa and Dresden at Value Village(of course!!).


Do you remember back in this post and this post, when I shared about making vegetable and meat/chicken stock? I extolled about the healthy benefits of consuming homemade stock/broth and showed a Vancouver business which sells cups of broth to drink. I even made a batch for my Dad to enjoy when he got out of the hospital a few weeks ago…and he has requested more!!!(He is doing very well, now that he is at home-thanks for your enquiries…huggs!)

Well, the above photo was in the Vancouver Sun today. Writing about this local company that has been making scratch-made stock-based soups and now sells it in the USA at Costco and Whole Foods. Even though they are located in the Vancouver area, they chose to start marketing their products in the USA and Japan. The soups are in the frozen section of the grocery stores and now they are about to start selling fresh soups in grocery deli's and local hospitals.

Here is the article, if you would like to read it:

Healthy soups boil down to big business for Richmond company

Global Gourmet Foods banks on fresh ingredients, homemade stock


The other day, I tried a new recipe...and it's a hit! Yumm! 
I found it on my favourite recipe site: allrecipes.com and I thought I would share it with you here:

Salisbury Steak with Mushrooms

1 lb lean ground beef
1/3 cup breadcrumbs(I used the seasoned ones)
1/4 cup chopped onions
1 egg, beaten
1 t. salt
pinch ground black pepper
2 cups beef broth
1 lg. onion, thinly sliced
1 cup sliced mushrooms
3 T. cornstarch(I ended up using more as I had added more stock than required)
3 T. water

1. Combine gr. beef, bread crumbs, chopped onion, egg, salt, and black pepper in a bowl until evenly mixed. Shape into 4 patties, about 3/4 inch thick.

2. Fry patties in a large frying pan until browned on both sides-about 10 mins. Add beef broth, sliced onion, and mushrooms, bring to a boil. Reduce heat to Low, cover and simmer until patties are no longer pink in the centre-about 10 mins. Transfer patties only to a platter and keep warm.

3. Bring beef broth mixture to a boil. Mix cornstarch and water in a small bowl(this is called a slurry and I use a fork to do this) and stir into the broth mixture. Cook and stir until broth mixture is thickened like gravy, about 1 minute or so. Pop patties back into the pan and warm through, coating them in the beef/mushroom gravy.

Serve with veggies(I served our with scalloped potatoes and corn niblets).
Makes 4 servings.
Enjoy!


I just love, love this stack of fat quarters…deee-lish! It will be so hard to cut into them. 


**Don't forget about my Country Village Quilt-A-Long featuring the above Maison De Provence fabric line from Connecting Threads. Part 1 can be found here, and you can also click the Country Village QAL, 2015 tab (found under the blog title) to find all the steps as they are posted (on Wednesdays). This tab will stay up indefinitely, so if you miss a post or need to be reminded about something, you can go to the step with ease!

Sharing is caring!!! 
Don't forget that I am happy to share with your friends…feel free to pin to Pinterest, post on Google+ and Facebook, and Tweet away! Just please play fair and make sure your posts link back to this blog. 
*If you mouse/hover over the top right corner of my photos, a red "Pin-it" button will show up and all you have to do is click it to be taken to Pinterest. There is also another red button right beside it for posting to Facebook and Twitter. Or, you could always use the little square grey buttons at the end of this post.

Thanks for reading and have a great day! 

Quilty Huggs, 

Jacqueline 

PLEASE NOTE: This blog accepts forms of compensation such as, but not limited to; fabric/notions/patterns/books in exchange for a posted review and/or tutorial. All comments/critiques/opinions are completely my own and are not those of the provider. This blog may also contain affiliate links and I will receive a small commission if you make a purchase after clicking on one of my links. Thanks so much!

Wednesday, April 29, 2015

COUNTRY VILLAGE QUILT-A-LONG! YAY!!! PART 1: Introduction, Schedule and Supply List ;-)

Hi peeps! 


For blocks and cornerstones

As promised in this post last Wednesday, today is the starting point for my Country Village Quilt-A-Long! Below is a hand-drawn example of the Country Village quilt block, designed by me(yay)! Sorry, I was not organized enough to have a sewn up a block for you beforehand…grr... 

So, please bear with me until next QAL post when there will be a real live block for you to see! I don't dare show you my own "test sample" block as it is made up with ancient, hideous, floral prints that I got in a scrap bag from Value Village!!!

I am working with the Maison de Provence fabric line(pictured above) by Connecting Threads. The photos don't do it justice at all, as the prints are so much more rich and vibrant. It is also economical-this line costs only $5.96 a yard!

Just so you know-Connecting Threads has generously provided me with the Maison De Provence fabric, a spool of Essentials thread and the Hobbs batting needed for this QAL, at my request.


Schedule(Wednesdays)...subject to change if I fall behind!!!

1. April 29- Introduction, schedule of posts and supply list.

2. May 6-Cutting fabrics for the Country Village blocks, cornerstones and sashing strips(we will cut the borders and binding strips in later posts).

3. May 13-Instructions for piecing the Country Village blocks.

***4 week break for piecing the 25 blocks***

4. June 17-Adding lattice strips, corner stones, laying out the blocks and sewing them all together. (I have a special way of doing this!)

5. July 1-Cutting and adding both borders.

6. July 7-Preparing the pieced backing and label.

7. July 14-Spray-basting the three-layer quilt sandwich.

**Break now till mid-September/October. It is just too hot to machine quilt!**

8. TBA-Machine Straight-Line and Free-Motion Quilting.

***2+ week break to allow for machine-quilting the entire quilt***

9. TBA-Cutting and sewing the binding to the quilt. 

10. TBA-View of the finished quilt after washing.

These are the three fat quarters that I removed from the 28-piece Maison De Province fat quarter bundle. The print on the left will be used for part of the Country Village block centres and the middle print is the "background" print. I might use the print on the right as corners on the outer border, but that will have to wait till the blocks are put together into a flimsy!

Fabric Requirements and Basic Supplies

*I have included the Connecting Threads fabric names and stock numbers so that you can make your quilt with Maison De Provence, exactly like mine…or you could choose another of their lovely fabric collections!

-25 dark or medium-dark value fat quarters(for blocks)*. I used 25 of the 28-piece Maison de Provence fat quarter bundle, #7213.(A fat quarter is a 18" x 21"-22" cut of fabric). * you could use a linear quarter yard cut(9" x 42") of fabric instead of a fat quarter. 

-0.75 yard of a contrasting medium to medium-light print(block centres).* French Medallion-Parchment, #7172, shown above on left. 
*you will have to piece one square from scraps if you have not also purchased the 28-piece fat quarter bundle…or you can always purchase 7/8ths yard of this fabric.

-4.5 yards of a light fabric(background)-can be a tone-on-tone like mine, above centre and below). Colette-Parchment, #7165.*
*I don't pre-wash my fabrics, so if you do, please purchase 4.75 yards of this fabric. The same goes if you are unsure or new to rotary cutting(buy 4.75 Yds).

-0.5 yard of a dark or medium-dark co-ordinating print(inner border), see burgundy print, second photo down. Feathered Sprigs-Rosewood, #7178.

-1.5 yards dark print,(outer border), see dk. green sprigged print in second photo below. Colette-Med. Mineral Green, #7163.

-1.25 yards dark co-ordinating stripe(bias binding). Cote d'Azur-Multi, #7157.

-2.5 yards wide backing. Amelie 104 Wide Backing-Lt. Mineral Green, #7191.

-100% Cotton or cotton/poly blend thread-Essentials brand in Sandstone, #20950. 

-Batting-queen-sized, must be at least 90" x 90". Hobbs Tuscany Cotton/ Wool Blend Batting, #21303. 

Also: Sewing machine in good working order, rotary cutter with new blade, various square and rectangular acrylic rulers, straight pins, new all-purpose needle in your machine, quilting needle, iron and ironing board.

PS: You can copy and paste these requirements(and the schedule as well) into a word document to make it easier to refer to.

**I will be putting all of the Quilt-A-Long posts under their own tab just under my title header. That way you can find a specific step with ease!


This is for the "pathways" or "background" of the blocks and lattice strips. It is difficult to see in my photo, but this is a tone-on-tone print.

From left: Centres, inner border, outer border and binding-to be cut on the bias.


Backing fabric and my thread choices for piecing and machine-quilting. For piecing, I always use two colours, one slightly darker than the other. For this project, I will be using my 5,000-yard cones of Sandstone, #20982, in the needle, and Taupe, #20980 in the bobbin. I find it easier to distinguish which thread is top and which is bottom this way. I got these two cones during a Connecting Threads sale and they last a super looong time!!!

Queen-sized cotton-wool blend batting. I am SOOO stoked to try this batting out! Has anyone used cotton/wool batting before? It is very light and soft and I think it would beautifully show off hand-quilting.

I hope that you are as excited as I am to get started on this Quilt-A-Long! 

Feel free to leave a comment or email me(my addy is on the "Drop me a line" page), if you need some assistance or even if you don't; I love hearing from you!

Sharing is caring!!! 
Don't forget that I am happy to share with your friends…feel free to pin to Pinterest, post on Google+ and Facebook, and Tweet away! Just please play fair and make sure your posts link back to this blog. 

*If you mouse/hover over the top right corner of my photos, a red "Pin-it" button will show up and all you have to do is click it to be taken to Pinterest. There is also another red button right beside it for posting to Facebook and Twitter. Or, you could always use the little square grey buttons at the end of this post. 


Thanks for reading and have a great day! 

Quilty Huggs, 

Jacqueline 

PLEASE NOTE: The writer of this blog accepts forms of compensation such as, but not limited to; fabric/notions/patterns/books in exchange for a posted review. All comments/critiques/opinions are completely my own and are not those of the provider. This post may also contain affiliate links and I will receive a small commission if you make a purchase after clicking on one of my links. Thanks so much!